Monday, July 20, 2015

Solving the mother of all sudoku puzzles

This post is all about sudoku, the venerable Japanese puzzle. Even though the hype lies far behind us, every once in a while I get bored and return to solving a few puzzles. But then one day I was given an exceptionally hard to beat sudoku puzzle. Even after hours of staring it down, I wasn’t getting anywhere. Hmmm… I was not going to be belittled by some stupid puzzle! And so I decided to cheat a little and crack it by writing a sudoku solver.

Sudoku is a numbers game, but there is no calculation involved whatsoever. The ‘game board’ is a set of 9×9 tiles, each containing a number from 1 to 9. The numbers in a row must be unique, however, as well as the numbers in each column, and the numbers in each 3×3 sub block.
Some numbers are given; it is up to you (the player) to fill in the gaps. Once all the numbers are filled in according to the given rules, the puzzle is solved. In general, a sudoku puzzle has one, and only one, unique solution.


First of all, let me mention that brute-forcing it is a definitive no-no. There are countless possibilities that do not lead to the solution. I figured that the total number of permutations would be around 9×9! (over 3 million), but two researchers have calculated that there are 5,472,730,538 (almost 5.5 billion) essentially different sudoku grids. The number of raw permutations is much larger however, in the range 6.67×10²¹.
Trying them all is going to take forever, even on the fastest computer available today. We need to be smarter than that—why not simply play the game and see where it gets us?

In order to let the computer play, we are going to need a couple of routines:
  1. load a given sudoku puzzle
  2. check whether puzzle is correct
  3. find cell with only one possibility left
It’s easy enough to store the puzzle into a 9×9 array of cells. Each cell holds a number, but also has a property saying whether it’s a ‘solid’ cell, or can be filled in by the player.
Checking the correctness of the puzzle is a three-step process: check all the rows, columns, and 3×3 blocks. Finding a cell with only one possibile solution also checks all the rows, columns, and 3×3 blocks.

This is a reasonable start for a solver program, but note that it will only solve the most naive beginner-level sudoku puzzles. The problem is, there will be cells that have more than just one option, and this solver is just not good enough. For the super evil sudoku, we are going to have to do better than this.

Rather than finding a cell with only one possible solution left, let’s take a look at what possible solutions there are for a blank cell. A blank cell may have any number between 1 and 9, unless that number is already present in that row, column, or 3×3 block. Any already filled-in numbers are removed from the set of possible solutions for the cell. The remaining set holds a number of possiblities, of which one is the solution for this cell. Let’s try them all, but because we want to have the solution as quickly as possible, start with the cell that has the smallest set. So if there is a cell with only one or two possible solutions, try that one first before moving on to harder to crack cells.

As you are trying out possible solutions, the numbers lock into place and they can no longer be part of solution sets in other cells that are in the same row, column or block. Slowly, the puzzle is being solved. But we may still hit a wall and have to go back to the point where we tried a wrong possibilty; this happens because not all attempts lead to a perfect puzzle. Many configurations are invalid, and need to be discarded.

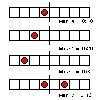
Going back is easily done by means of backtracking. Backtracking works by recursion. I find it easy to think about in terms of functional programming; in functional programming, objects are immutable, they can not be changed. If you wish to change the state of an object, then that is a new object, albeit a modified clone of the object.
So whenever trying a solution to a cell, clone the whole puzzle. Put that puzzle object onto a stack. Now recurse, and try solving the next cell. If the puzzle is invalid, backtrack: pop the stack and return. As the recursive function is returning, it will continue trying the next solution to the cell. Notice how cells that ‘work’ are followed-up on and lead to the next step in solving the puzzle, and solutions that don’t work tend to cut off excess work.

I implemented this solver in Python. Implementation detail: cloning is done with deepcopy.copy(). My aging computer solves the evil sudoku in under half a second. On the Raspberry Pi 2 it takes 3.5 seconds. Remember that brute-forcing would take forever. You don’t need a fast computer (nor a low-level programming language) to pull this off. What’s important is choosing the right algorithm.

Backtracking is the algorithm for this kind of puzzles, where a partial list of candidates could lead to a solution. In fact, after finding a solution, the algorithm may continue to run and find all solutions. In a bold move, I handed it a completely blank 9×9 grid. It started spewing out all solutions to sudoku … each and every sudoku there is, ever was, or ever will be. And after a while, I hit Ctrl-C.

Sunday, June 14, 2015

Live Coding & Hotloading

This marks this blog's 100th post. Well, it's number 98 really, but two posts have been held back forever as draft. Anyway, I have been saving something special—a magic trick to impress your friends with. I saw this trick being performed live by an oldskool game programmer on Twitch, and it's called “live coding”. It enables you to type in some C code, and immediately see the results onscreen, even while the game is running. How can that be? It's a kind of magic.

Computers aren't any good at performing magic tricks, so something must be happening behind the scenes. As you may know, games run in a loop. What you see onscreen, is the result of frames being rendered by the render loop. With live coding, we dynamically load newly compiled code, and execute it. So, we are effectively changing the game code as it is running. The result is as if we are using C as an internal scripting language.
This is made possible by dynamic linking; rather than statically linking executable code, a shared object is loaded and linked at run-time. The coolio term for dynamic linking is “hotloading”.

Hotloading requires the game to be written with a certain structure; the game loop is in the main program, while the actual gameplay functions are dynamic, they are compiled into a shared object. It is a loadable module, like a plugin. The main program will check whether a newer shared object file is present in the directory, and if so, load it.

The functions for loading a shared object file at run-time are platform-specific. On UNIX (think Linux, OSX) you use dlopen(), dlsym(), dlclose().
On Windows, use LoadLibrary(), GetProcAddress(), and FreeLibrary().
Or we can use SDL to do this in a portable way:
typedef void (*Func)(void *);

    if (handle != NULL) {
        SDL_UnloadObject(handle);
        handle = NULL;
    }
    handle = SDL_LoadObject(filename);
    if (handle == NULL) {
        error("failed to load %s", filename);
    }
    func = (Func)SDL_LoadFunction(handle, "game");
    if (func == NULL) {
        error("failed to find symbol 'game'");
    }
The code shown will load a shared object file, and find the function named game. Afterwards, we can call func(), effectively calling game().

It's not all that easy though as there are some caveats. You will want to add live coding capability in the early stages of development; adding it later on is going to be painful. I will try to explain why.

Notice that we obtained a pointer to a function by searching for the symbol, ie. the function name. Mind that on Windows, that works both ways; if you want to call a function from the game code that resides in the main part, you need to know where that function is. Hence the desire to structure the program such that we need to know about as few functions as possible.
I had no problem whatsoever on UNIX, where calling functions back and forth like that works naturally, out of the box. If you develop on UNIX and forget about this bitsy detail, you will be in a world of pain when you want to port to Windows later on.

Secondly, all global variables must be declared in the main part of the program. You can't put them in the shared object, because that memory is going to be unloaded and replaced once the new version gets loaded. This means that you also can not have any static variables in the module. If you do, the variable will lose its value when the module is unloaded and the game will misbehave.
This asks for a coding style where you invariably pass a pointer to a big bad struct that contains everything, and I do mean everything, that should be globally accessible to the entirety of the program.
Personally, I'm not fond of this style at all—say what you will, but I like having statics in my modules.
In turn, this quickly leads to doing your own memory management. Note that it is a myth that live coding requires you do your own memory management.

Another myth is you can't use C++ with live coding. C++ compilers do name mangling, throwing a spanner in the works. You can work around this by making sure that the interface is in plain C, and does not rely on C++. Entry point functions should be declared extern "C".

Because all globals live in a big struct, you can't use live coding for making large changes. You can't add new globals. Once you touch the layout of the big memory structure, the program will crash. And if it doesn't crash, you will be overwriting fields in memory unintentionally.

My programmin’ brother dismissed live coding as a gimmick. It is super useful for tweaking small parameters like monster speed, hit points, and such. But all these parameters shouldn't be hard-coded in the first place; they should be tunables in the game engine that developers can play with as the engine is running.

Despite its drawbacks, seeing live coding in action is most impressive. It allows you to experiment in a playground. It turns good old C into a scripting language, and you must admit, that's all we ever wanted.

Sunday, May 17, 2015

Loading PNG images with libpng

For textures in games I'm often inclined to quickly grab some old TGA (targa) loader. The code works, and thus I've been dragging it along for years. Another often used format is Windows BMP. Writing an image loader can be quite an undertaking, which is because of the huge variety of features a single image format may support. Lucky for us, we don't have to write a PNG loader from scratch; let's use the libpng library.

About the PNG image format
Nearly 20 years ago the PNG (Portable Network Graphics) image format was invented for the Web. Up till then, the most used image formats were GIF and JPEG. GIF supports only 256 colors, and uses a patented compression method. JPEG does not support transparency, and uses lossy compression, resulting in visual artefacts.
PNG improved greatly on this by supporting 32-bit color, transparency, and lossless compression. Moreover, it's absolutely patent-free and freely available. Since it was invented for the Web and not photography or printing press, PNG lacks alternate color schemes like CMYK, and you won't find the image format being used for those applications. It's a good fit for our purposes, however.

The PNG file format consists of a header followed by a number of chunks. The most basic chunks are PLTE (palette) and IDAT (data), but there are many other kinds of chunks, for example for storing color information and metadata, like last modified time. The image data is compressed with the deflate algorithm, which is the algorithm used by zip/unzip. Deflate does lossless compression, and more importantly, the algorithm is not patented. It is present in zlib, which is also freely available.
However, the image lines are filtered by one of five possible filter types to improve the compression rate. Many kinds of pixel formats are supported. Finally, PNG supports interlacing, so pixels aren't necessarily stored neatly in sequence.
This is just to illustrate that writing a PNG loader from scratch is not easily done. We don't have so much time on our hands, and will therefore be using the library.

A walkthrough of the code
Let's load up some pixels — should be easy, right? So you open up the manual for libpng, only to find that it starts with a whopping 20 pages listing just function headers. That's right, there are about 260 different functions in libpng. We won't need to use them all, but unfortunately, loading a PNG image is not quite straightforward. But let's get down to it.
Our PNG_Image class will have height, width, a bytes per pixel member, a color format (for OpenGL), and a pixel buffer. Following is the annotated code needed to load a PNG image. The method will take a filename and return true on success.

In the top the file, include the appropriate headers:
#include <png.h>
#include <gl.h>

First off, we will want to open a .png file and check the header for the “PNG” signature.
    FILE *f = fopen(filename, "rb");
    if (f == nullptr) {
        return false;
    }

    // check that the PNG signature is in the file header

    unsigned char sig[8];
    if (fread(sig, 1, sizeof(sig), f) < 8) {
        fclose(f);
        return false;
    }
    if (png_sig_cmp(sig, 0, 8)) {
        fclose(f);
        return false;
    }

Next, we need to create two data structures: png_struct and png_info. Many of libpng's functions will require us to pass in these structs. You can think of png_struct as a “PNG object” that holds state for various functions. It won't hold any image data, however. The png_info struct will hold metadata like image height and width. Creating these structs allocates memory from the heap; if anything goes wrong we must take care to deallocate them, or else we'd be leaking memory.
[Also mind that we still have an open file].
    // create two data structures: 'png_struct' and 'png_info'

    png_structp png = png_create_read_struct(PNG_LIBPNG_VER_STRING, nullptr, nullptr, nullptr);
    if (png == nullptr) {
        fclose(f);
        return false;
    }

    png_infop info = png_create_info_struct(png);
    if (info == nullptr) {
        png_destroy_read_struct(&png, nullptr, nullptr);
        fclose(f);
        return false;
    }

Mind that plain C has no exceptions. To work around this, libpng has an error handling mechanism that works with setjmp(). Imagine decompressing a corrupted image, and you don't want the program to crash. What libpng does is, it jumps back to the point where you issued the setjmp() call. So this here is just some cleanup code.
    // set libpng error handling mechanism
    if (setjmp(png_jmpbuf(png))) {
        png_destroy_read_struct(&png, &info, nullptr);
        fclose(f);

        if (pixels != nullptr) {
            delete [] pixels;
            pixels = nullptr;
        }
        return false;
    }

Q: Where did that pixels array come from?
A: That's our pixel buffer member variable. It won't be allocated until later. The construction with setjmp() is turning the code inside out.

We are just getting started here. Let's gather some basic information: image height, width, and such.
    // pass open file to png struct
    png_init_io(png, f);

    // skip signature bytes (we already read those)
    png_set_sig_bytes(png, sizeof(sig));

    // get image information
    png_read_info(png, info);

    w = png_get_image_width(png, info);
    h = png_get_image_height(png, info);

We're only interested in RGB and RGBA data, so other bit depths and color types are converted. So even if the image is in grayscale or whatever, we will get RGB data when reading the image. It's nice that libpng can do these conversions on the fly.
    // set least one byte per channel
    if (png_get_bit_depth(png, info) < 8) {
        png_set_packing(png);
    }

PNG may have a separate transparency chunk. Convert it to alpha channel.
    // if transparency, convert it to alpha
    if (png_get_valid(png, info, PNG_INFO_tRNS)) {
        png_set_tRNS_to_alpha(png);
    }

Next, get the color type. The format variable is meant as a parameter for OpenGL texturing. If the format can not be determined, give up and return an error.
    switch(png_get_color_type(png, info)) {
        case PNG_COLOR_TYPE_GRAY:
            format = GL_RGB;
            png_set_gray_to_rgb(png);
            break;

        case PNG_COLOR_TYPE_GRAY_ALPHA:
            format = GL_RGBA;
            png_set_gray_to_rgb(png);
            break;

        case PNG_COLOR_TYPE_PALETTE:
            format = GL_RGB;
            png_set_expand(png);
            break;

        case PNG_COLOR_TYPE_RGB:
            format = GL_RGB;
            break;

        case PNG_COLOR_TYPE_RGBA:
            format = GL_RGBA;
            break;

        default:
            format = -1;
    }
    if (format == -1) {
        png_destroy_read_struct(&png, &info, nullptr);
        fclose(f);
        return false;
    }

This is how to get the number of bytes per pixel, regardless of channels and bit depth:
    bpp = (uint)png_get_rowbytes(png, info) / w;

[That bpp variable is bytes per pixel, not bits per pixel].

We don't want to receive any interlaced image data. Even if the image is interlaced, we want to have the ‘final’ image data. There's a func for that:
    png_set_interlace_handling(png);

We are done reading the header (info) chunk. You need to tell libpng you want to get ahead and skip the rest of the chunk.
    png_read_update_info(png, info);

Now we are ready to go read the image data. We deferred allocating the pixel buffer up till now (this is how the manual says you should do it).
Annoyingly enough, png_read_image() expects an array of pointers to store rows of pixel data. So you need to construct both a pixel buffer and a temporary array of pointers to the rows in that pixel buffer. And then you can read the image data.
    // allocate pixel buffer
    pixels = new unsigned char[w * h * bpp];

    // setup array with row pointers into pixel buffer
    png_bytep rows[h];
    unsigned char *p = pixels;
    for(int i = 0; i < h; i++) {
        rows[i] = p;
        p += w * bpp;
    }

    // read all rows (data goes into 'pixels' buffer)
    // Note that any decoding errors will jump to the
    // setjmp point and eventually return false
    png_read_image(png, rows);

You actually need to read the end of the PNG data. This will read the final chunk in the file, and check that the file is not corrupted.
    png_read_end(png, nullptr);

Finally, clean up and return true, indicating success.
    png_destroy_read_struct(&png, &info, nullptr);
    fclose(f);
    return true;

Well ... that was a little odd, but we managed to load some pixels. Not included in this tutorial: we can pass the pixel buffer on to OpenGL to create textures.

Opinion or plain justified criticism
libpng provides tons of functionality for working with PNG images. Be that as it may, there is a lot not to like here. For one thing, loading an image is a ridiculous, unwieldy process. Conspicuously absent is a simple and stupid png_load() function that does all that listed above, now left as an exercise by the developers of libpng.
All I wanted to do was load an image, but libpng required me to learn everything there is to know about the file format, the library, and then some.
At any rate, do the dance and it will work. If it's too much for you, there's always SDL_Image.

Monday, April 27, 2015

Fast Pseudo Random Number Generator

Games need a good pseudo random number generator (PRNG). Flipping cards, rolling dice, determining hit points, choosing whether to fire a bullet or not, all these are random choices. Random is a strange phenomenon though. The set of numbers 1,1,1,1 is just as random as 4,2,1,3 — even though I carefully hand-picked both sequences, the latter looks more random. A shuffled list of numbers is perceived as being more random than a list of truly random numbers.

It is a well-known fact (or actually, myth) that computers do not do random numbers; instead they are computed and therefore they are predictable. This was true until computer scientists found that real-world noise like typing speed, mouse movement, networking interrupts, and hard drive rotation statistics may be used for entropy: a source for random number generation. This is only a source though and the produced random number sequences may still be predictable depending on the algorithm used. Cryptographically safe RNGs aim to make it impossible to guess the next random number. There is a kind of chicken-and-egg relation here: crypto functions need good RNGs to be able to scramble the input; the scrambled output appears as random as any random data. Therefore the crypto function can be used as a RNG.

Anyway, there are some problems when it comes to games. Fast-paced action games may make hundreds of random choices every frame. At 60 frames per second, we don't want to take too much time generating random numbers. Therefore cryptographically safe RNGs are off limits, we are going to have to settle with a more predictable PRNG.
Another problem is that at 60 fps, we might quickly drain the entropy pool. We can't afford having to wait for new entropy, and we don't want the operating system to run out. So even though modern operating systems can supply fairly truthful random numbers, we are not going to bother and stick with “decent enough” instead; we are going at it old-skool and calculate the pseudo random numbers by ourselves.

PRNG requirements for games:
  • it must be fast
  • it must show good distribution
  • not repeating numbers often
  • no cryptographically safeness required

In them old days, we would use rand() and seed it by calling srand(). rand() is a notoriously bad PRNG and you should not use it nowadays. The BSD man page even calls it “bad random number generator”. It has a low period, meaning that after a while the same prefix starts to repeat. This is a bad habit for a PRNG.
I personally have bad experiences with rand(). My Tetris clone would happily generate the same block over and over again, giving some really bad gameplay experiences. I started handing out bonuses for this, but it didn't make it more fun. The game notably improved when I switched to a different PRNG.
The modern, new and improved equivalent of rand() is random(). It should be noted however that there might be a portability issue here; random() may not be available on your platform of choice.

Mersenne Twister
A popular modern PRNG is the Mersenne Twister. It is named after the Mersenne prime number that it uses. It is a well respected PRNG, and an easy choice for C++ programmers, as it is included in the C++11 standard library. The C++11 way to get some random numbers is:
#include <random>

    std::random_device rd;     // only used once for seeding
    std::mt19937 rng(rd());    // select Mersenne Twister
    std::uniform_int_distribution<int> dist(0, 1000);
    int n = dist(rng);
The Mersenne Twister is relatively slow for game code. Apparently it badly stresses the CPU cache.

XorShift
The most simple and fastest decent PRNG there is, is the XorShift algorithm. It simply does a couple of bit-shift and exclusive-OR operations, and that's it. It has four internal state variables that you should initialize (in a more or less random manner, as you see fit).
uint32_t xorshift128(void) {
    // algo taken from wikipedia page
    uint32_t t = state.x ^ (state.x << 11);
    state.x = state.y;
    state.y = state.z;
    state.z = state.w;
    state.w = state.w ^ (state.w >> 19) ^ t ^ (t >> 8);
    return state.w;
}
XorShift is incredibly simple, but good enough for games. In that respect, it is a perfect fit for our purposes. There are XorShift* and XorShift+ variants, that use multiplication and addition respectively, and produce 64 bits values.

Statistical Analysis
In a feeble attempt to prove that XorShift suffices, I calculated the standard deviation for a series of numbers between 0 and 1000 generated by rand(), random(), std::mt19937, and xorshift128(). They all produce a standard deviation around 285, meaning that they all exhibit the same fairly high spread of values. In that sense, we can say that probably they all produce sets of random values usable for games. This is by no means an extensive analysis of the PRNGs, of course. There exists a test suite named TESTU01 for testing PRNGs, but I'll leave it up to the math and computer scientists to play around with that.

For now, I'm happy to have found that the XorShift PRNG is exceptionally fast, while still producing decently enough pseudo random numbers. It is a perfect fit for games.

Two interesting links for further reading:

Sunday, March 8, 2015

Wrapping Worlds

In the classic game Pac-Man, there is a tunnel in the middle of the level, when you go in on one side, you emerge on the other side of the screen. It plays an important part in gameplay, as you can use it to evade the fast red ghost.
In the classic Defender, if you fly your spaceship far enough to the right (or left, as you can go both ways), space will wrap around and you will eventually return to the same point. The game world of Defender is cylindrical.

You will find this technique of wrapping worlds a lot in classic 2D games. It doesn't work well for 3D games, because of their level of realism and immersiveness, it feels weird if a 3D world wraps. [The irony is that the real world does seem to wrap around, as observed by a traveller on the ground]On the other hand, I always I feel weird when reaching the edge of the obviously square world in 3D games.
Anyway, wrapping worlds are a lot of fun for 2D retro style games, and I couldn't find much information on the net how to go about and implement such a thing. So I devised a couple of methods and wrote them down here.

1. The straightforward way
Wrapping is simply achieved by using the modulo operator. If the player moves off the map, her new position is mod the world width. Consequently, when a player moves off the map on the right, she re-emerges on the left. That was easy.
But not so fast. A monster chasing the player will effectively see the player being teleported from the right side of the map, to the far left side of the map. The monster will now change direction, and has to travel all the way across the map in order to get near the player again. So to fix this, you might set a flag that a monster is not allowed to turn if ... But there is more. A similar problem exists for monsters that live in the left side of the map. They will not see that the player is actually close nearby, until the player is teleported in over the right edge of the map. By now it's becoming clear that wrapping is not as easy as it looks.

2. Overscan areas
Rather than having the map just be the map, allow the player (and everything else) to exist in a boundary outside the world. The boundary area is like an overscan area.
This region is a copy of the other side of the world. Once the player ventures too far, teleport everything in the overscan area to the other side.
The overscan area should at least be a screen wide to work properly. Maps should also be at least two screens wide. This method is relatively costly on memory because it duplicates large parts of the map.

3. Far offset
The previous method still has a problem with the direction of monsters that are outside the screen.
A way to solve this is to have the game take place at a far offset. The problem with wrapping is partly because we're too close to zero. By translating the origin to, say, 100,000, we're largely preventing the problem of monsters heading the wrong way. It's mostly a band-aid though as the situation still does exist. Eventually the player may reach the zero line, at which everything needs to be rebased at the far offset again. It is unlikely that any player will venture so far that she wrapped around the world a dozen times, but nevertheless possible.

4. Sliding window
Let the area around the player be a sliding window that glides over the map. The area should at least be what's visible on screen, but may be larger to allow off-screen monsters to come in and attack.
The sliding window uses ‘stripping’ to phase in and phase out relevant parts of the map. For example, as the window slides to the right, a vertical strip slides into the window on the right, and a vertical strip slides out of view on the left. This works particularly well for tiled maps. Monsters can be frozen into the tile map, and come to life as soon as they come into view. The coordinates of alive objects are relative to the sliding window (they are no longer in ‘map’ space) and therefore there is no directional problem when the world wraps.

I implemented each of these and they all work. What seems to me the best method however is the sliding window technique. Even for games that are not tile based at all, you may want to consider adding a tile grid anyway. The sliding window technique makes a clear distinction between objects that are alive, and objects that are not worth spending time on. You can enjoy a massive world with millions of objects without breaking a sweat. And what's fun, the world wraps.

Wednesday, February 11, 2015

Rock solid frame rates with SDL2

For fast-paced action games you need to have a steady framerate. If the framerate is not steady, you are likely to see stutter. It's a periodic wobble, jerky movement, as if a frame was skipped. It's very annoying, and once you see it, you can't unsee it. I ran into this problem and for a moment there, I just blamed SDL, heh! In forums online, I found more people complaining about stutter with SDL. The accepted answer on StackOverflow for this problem was wrong. Game dev forums did turn up some good tips. Finally, I was able to piece it together. Apparently this topic is not well understood by many—and the ones who do get it right don't seem to get just what the problem is. It has indeed to do with frame rate, but it's not skipping. Something else is up.

Loop the loop
Games run in a loop. You update some monsters, do the rendering, and cap the frame rate by delaying until it's time to display the next frame. It's likely to be programmed something like this:
    move_monsters();
    render();

    float freq = SDL_GetPerformanceFrequency();

    now = SDL_GetPerformanceCounter();
    secs = (now - last_time) / freq;
    SDL_Delay(FRAMERATE - secs * 1000);

    swap_buffers();
NB. You might also use SDL_GetTicks(). SDL  2 offers new performance counter functions. These have much greater precision than SDL_GetTicks().

We've subtracted the time that the game was busy, so to complete a frame we need to wait the remaining time. This is exactly where the bug is, odd as it may seem. To prove it, try timing SDL_Delay() calls in a loop:
    float freq = SDL_GetPerformanceFrequency();

    t0 = SDL_GetPerformanceCounter();
    SDL_Delay(30);
    t1 = SDL_GetPerformanceCounter();

    printf("time slept: %.2f msecs", (t1 - t0) / freq * 1000.0f);
Result:
    time slept: 31.51 msecs
    time slept: 31.31 msecs
    time slept: 34.06 msecs
    time slept: 32.15 msecs
    time slept: 34.54 msecs
    time slept: 33.07 msecs
But we asked to sleep only 30 milliseconds! How can this be?

The problem is not so much with SDL as with the operating system. This can be proved by replacing SDL_Delay() with usleep(), and the problem persists. Even if you try the insanely precise nanosleep() call, the problem persists. Sleeping is inaccurate—despite the fact that modern computers are very capable of doing high precision timing.

Some try fixing this by sleeping a little less, and then doing a busy loop to get as close to the sleep time as possible. This almost works, but it it isn't perfect and you will still see stutter. The non-deterministic nature of a multitasking operating system gets in our way.

Thou shall wait
So, the system is incapable of sleeping an exact amount of time. How about not sleeping at all.
The trick of sleeping until the next frame is probably a spin-off of the waiting for vsync trick. But sleeping isn't the same thing, and it doesn't work because it doesn't necessarily bring you in sync with anything. So instead of sleeping, we are going to wait for vsync.
    sdl_window = SDL_CreateWindow(title, x, y, w, h, SDL_WINDOW_OPENGL);
    gl_context = SDL_GL_CreateContext(sdl_window);
    SDL_SetSwapInterval(1);
This is for use with OpenGL. It will enable the swap interval (wait for vsync) before swapping the render buffers. You can remove any SDL_Delay() calls, because during the swap interval the program already sleeps. If you are using the SDL render functions, it's done like this:
    renderer = SDL_CreateRenderer(win, -1,
        SDL_RENDERER_ACCELERATED|SDL_RENDERER_PRESENTVSYNC);
Now SDL_RenderPresent() will wait for vsync before presenting the buffer.

Moving on
That's only half of the story. The problem of stutter is not solely caused by an inaccurate sleep timer. It stutters because movement is too rigid:
    new_pos = old_pos + speed;
This sort of code always advances the position, no matter whether time advanced evenly or not. So in the case where time did not advance perfectly in line with the desired rate (which is impossible, as we saw earlier), this code will produce stutter.

To solve this problem, we must write code that can handle variable timings. It works just like in physics class:
    float delta_time = (now - t0) * (float)freq;

    new_pos = old_pos + speed * delta_time;
With SDL_GetPerformanceCounter() and SDL_GetPerformanceFrequency() you can calculate the time step for this frame in seconds. Note that delta_time holds a small value, so crank up the speed. If your game world is defined in meters, you can simulate things rather faithfully with speed in meters per second.

At last
Lo and behold, our frame rate is now rock steady and scrolling is super smooth. It's locked down at 60 fps, with very low CPU usage, even on my five year old computer. Like with Columbus' egg, it's easy once you know how.

My advice for testing is to create a large checkerboard and scrolling that across the screen. If it stutters, you will see it. Also try disabling the vsync just for fun, and watch the fps counter go nuts.

Sunday, January 11, 2015

Memory Management: the SLUB allocator

Last time I wrote about the SLAB allocator, a method for caching objects in a pool. And then I read about SLUB, the slab allocator that is present in modern versions of the Linux kernel, and got a bit carried away with it. SLUB is brilliant due to its simplicity, and like the Linux kernel, by now I have thrown out my SLAB code in favor of SLUB. That's how it goes with the software lifecycle; out with the old, in with the new. Descriptions of how these allocators work often either do not go into enough detail, or are way too cryptic to understand, so I'll do my best to shed some light.

Pool allocators basically cache objects of the same size in an array. Because we are talking low-level memory allocators here, the absolute size of the array is always going to be a single page. A single page is 4 kilobytes. [Yes, I know hugepages can be 2 megabytes, and sometimes even a gigabyte, but for the sake of simplicity we'll work with regular 4k pages here].
To keep track of what array slots are in use and what slots are free, they keep a free list. The free list is just a list of indices saying which slots are free. It is metadata that has to be kept somewhere. The difference between SLAB and SLUB is the way they deal with that metadata (and boy, what a difference it makes).

In SLAB, the freelist is kept at the beginning of the memory page. The size of the freelist depends on the number of objects that can fit in the page. When the objects are small, more objects can fit into the page and the freelist will be larger than when the object size is large, not as many objects can fit in the page.
SLUB is much more clever than this. SLUB decides to keep the metadata elsewhere, and uses the full page for object storage. The result is that SLUB can do something that SLAB can not: it can store four objects of 1k each in a 4k page, or two objects of 2k, or one object of 4k in size. This is something that SLAB could never do.


But what about the metadata? SLUB puts the free pointers inside the memory slots. The objects are free, so this memory is available for us to use.
The other metadata (like, where is the first free object? What is my object size?) is kept in a Page struct. All pages in memory are tracked by an array of Page struct. Beware the confusion here, a Page struct is not the actual memory page, it just represents the metadata for that memory page.

All we did was take that little bit of metadata from each slab, and store it elsewhere. The net result is that we can make use of memory much more effectively than before.

In our last implementation we used C++ templates to make things type safe. While this makes sense from a C++ programmer's perspective, it doesn't make any sense from a memory allocator's perspective. The memory allocator has bins for sizes, not for types. This alone is reason enough not to code it using templates. Stroustrup himself said that object allocation and object creation are separate, and there's no arguing with that.
Therefore the SLUB is implemented as a plain C code, and it turns out very straightforward and easy to understand. You have 4k of memory, the number of objects you can store equals 4k divided by object_size. The first free object slot is page_struct.free_index. When you allocate an object, return the address of slot[page_struct.free_index]. Update the free_index and zero the object's memory, of course. And that's all there is to it, really.

The engineers at Sun actually took into account CPU cachelines and had slab queues per CPU. This may have been a good idea in 1992 but becomes kind of crazy when you realize that today's supercomputers comprise tens (if not hundreds) of thousands processor cores.
SLAB also needs to take into account object alignment, which is automatic in SLUB as long as the object size is a multiple of the CPU's word size, and this is already taken care of by the compiler when it packs and pads a struct. At the end of the day, SLAB is unnecessarily complicated, over-engineered. SLUB says: Keep It Simple, Stupid!

Caches
When the slab runs out of free memory slots, you will want to get a new page and initialize it as a new slab. Likewise, when a slab is entirely free, you will want to release the page. This is trivially implemented using malloc() and free(). It's more fun however to actually cache these pages in a linked list. The pointers for the linked list can again be members of Page struct, it's metadata after all.
The Linux kernel optimizes for speed by keeping linked lists of full, partially full, and empty pages. When an object is allocated or freed, it always looks at the partially full list first. If after allocation the page is now full, the page is moved to the full list. If after freeing an object the page is now empty, the page is moved to the empty list.

You may wonder why it holds on to empty pages rather than releasing them immediately. The answer is that getting a new page may well take a long time. So, the empty list is an insurance policy that the cache can always quickly get a page.
If the cache is empty, it will have to get a new page from an other allocator. The Linux kernel implements the buddy allocator for managing blocks of pages. Implementing buddy allocator code is a bit complicated (and fun), I might write about that some other time.
Anyway, slab allocators are fascinating, and it's nice to know how they work. You can't talk about SLAB without talking about SLUB, and noting that simplicity beats complexity.