Sunday, December 12, 2010

C+Objects: A Python-esque Library for C/C++

Not so long ago, I wrote a rather large Python code, which turned out to be a very useful tool. It was thousands of lines of Python, but I wrote it in only a couple of weeks. I wrote it "with my eyes closed", churning out the code at a high rate, and yet the number of bugs was small and they were always easy to resolve whenever problems did occur. This is the power of Python. The ease at which you can produce useful, working code is simply amazing. Writing such a program in C or C++ would take much longer, months, maybe as long as a year. Skill has little to do with it. The language simply is easy on the developer. It makes things easy.

Python is a fine language, and while its performance is quite alright, when compared to the raw power of C or C++ it just doesn't compare. Neither would I be comfortable creating something like a game in Python. While this is perfectly possible, my personal experience directs me to libraries like SDL, OpenGL, OpenAL, and what not.
At the same time, a language like C++ is perfectly suited for creating games, except that the language itself is the cause of lots of stress. C++ is not an easy language. It is overly politically type-safe correct, to the point where a little word like 'const' or a wrongly placed & sign has a completely different meaning and makes your program do weird unintended things. C++ pros may laugh at me, but consider the fact that I'm actually using C++ professionally, too.

In C++, I can almost philosophically ponder all day long whether a certain class should be implemented this way or another. While the beauty of the design is worth investing precious time in, are you getting any work done? And time is precious indeed. If I had to choose between easily writing a working program in Python, or struggling with C++ just to make the compiler happy, I'd choose Python any day. If only I could bend C++ to make it play nice, make it see things my way ... and you actually can. C++ is a very odd (but cool) language, which lets you redefine operators to make it behave the way you want. Insanity, it even lets you redefine the "()" parens and the "->" deference 'operator' ! (gasp!)

The past weeks I've been working on this library which implements some basic objects like a Number, a String, an Array, a List, and a Dictionary. These exist in the STL, but are not quite like how I would like them to be -- like Python. Anyway, what an adventure..! The undertaking was heavier than anticipated. Each class is derived from a base class named Object, which is the base of everything.
C++ has this cool feature that when a local instance goes out of scope, it calls the destructor. So you have some kind of automatic memory management. But wait, it's much more complicated than this. What if we added our String to a List and the String goes out of scope? Boom, the program would break. Oddly, when you use new to allocate an Object, it remains in existence and the destructor is not being called. Of course, you say, this is basic C++. Now, we use this feature to allocate a backend for our String 'proxy' object. The proxy may go out of scope, but the backend remains. The backend is not deallocated until a reference count drops to zero. Yes, adding it to the List increments the reference count in the backend of the added Object.

Using this library, we can now write code that looks a lot like Python code, but is really compiled by a C++ compiler. The performance is less than optimal, but surely better than Python's. Is everything ideal now? Umm no, I ran into a problem where the compiler lost track what type of object it was really dealing with, and I had to resort to static_cast<>()ing the thing to the correct type. C++'s type-correctness is really annoying. One other thing is that adding a new class is hell. You need to implement both a proxy and a backend class, and you need to implement lots of methods (low-level stuff like operator=(const Object&)) to make it work. Of course, your new class will have new methods, and you will have to use dynamic_cast<>() on the pointer to the derived backend a lot, which is coding hell.

Although I succeeded (more or less) in implementing a Python-esque library to ease writing C++ code, I'm now considering dropping the idea of mimicking Python and moving away from a copy-by-value paradigm to a more efficient pointer-oriented solution, much like Objective-C has. In Objective-C, everything is a pointer to an instance -- you just hardly realize it due to its syntax. Objective-C code is not as easy to write as Python, but I really dig its nice API and its convention of having really long descriptive names for members.
In Objective-C, everything is an Object, and it has 'manual' reference counting via two calls: retain and release. Retain/release is not super-easy but it does help a lot when compared to old-fashioned C memory management. This may be combined with an autorelease pool to easily deallocate unused objects. Objective-C has another feature that is extremely useful: calling a non-existant method in an instance (because the var is nil, for example) results in nothing being done. No program crash, it simply ignores the fact. I yet have to think about how one could mimic this behavior efficiently. This time my weapon of choice would be standard C. Ah, the joys of good old plain C.

Saturday, October 9, 2010

Work, stress, and management

Now that we have entered the multi-core age, we should all be writing multi-threaded code. Even though it's nothing new, I'd still like to devote a (another) blog post to it. I came up with an extremely generic model that applies in most cases. It is based on the producer-consumer model, but with a twist. The standard producer-consumer is often a bit too simplistic in practice.
The Worker
Suppose we have a main thread that has a bunch of work to do. The work must be a number of tasks that are all the same, like for instance scaling a number of images. It doesn't really matter what kind of work it is, as long as you have a number of units that must be processed.
A single work unit is abstracted into a work object. This single work object will be processed by a process function. The process will be executed by a worker thread, who handles the work units. The work will be given to the worker by the main thread; the main thread acts like a manager.
This is a standard producer-consumer paradigm where the producer injects work, while the consumer takes work.

The Stressful Worker
Now imagine that processing a work unit takes some time, and the main thread doesn't have much else to do. This will mean that the main thread will be quick to hand out more work, piling it up for the worker as it is processing each unit one by one. This is overburdening the worker.
A solution to this problem is to have the manager wait until the worker is finished. You can optimize this and hand out a number of work units to a worker before waiting until the workload drops below a certain threshold. Note that the workload is really the length of the work queue (in the case where all work units are alike).
Another solution is to have the manager co-operate and let him do some work himself. This changes the model (and the code!) a lot since in this case, it's better to have the worker take on work by itself rather than being a slave.
Another solution is to have the manager manage multiple worker threads, one for each available core in the system of course. Depending on the type of work, it may or may not be easily possible to make use of multiple threads.

Some pseudo-code
Here's some pseudo-code to illustrate what I've been talking about.

1. The naive implementation, which causes overburdening the worker:
# the manager (producer)

for work in pile_of_work {
worker.give_work(work)
}
worker.time_to_go_home = 1

# the worker (consumer)

forever {
work = get_work()
if not work {
if time_to_go_home {
exit
}
continue
}
process(work)
}

2. The stressful worker, with a kind manager:
# the manager (producer)

for work in pile_of_work {
while worker.workload >= max_load {
sleep a bit or do something else
}
worker.give_work(work)
}
worker.time_to_go_home = 1

# the worker (consumer)

forever {
work = get_work()
if not work {
if time_to_go_home {
exit
}
continue
}
workload += 1
process(work)
workload -= 1
}

Clever people will note that sleeping is ugly and the manager should block instead until it is notified by the worker that it is done doing its job. This is best implemented using condition variables:
# the manager (producer)

for work in pile_of_work {
worker.give_work(work)
manager_condition.wait()
}
worker.time_to_go_home = 1

# the worker (consumer)

forever {
work = get_work()
if not work {
if time_to_go_home {
exit
}
continue
}
workload += 1
process(work)
workload -= 1

if workload < maxload {
# signal I'm ready for more
manager_condition.signal()
}
}

In this last case, I let the worker decide if he's ready to take on more work.
Python programmers get away easy: there happens to be a standard Queue class that implements the above workqueue, complete with a maximum workload that blocks the producer when the worker is being overburdened.

Wednesday, September 15, 2010

tutorial: Key Value Coding done right

In MacOS X / Cocoa, there is this concept of "Key Value Coding". It allows you to loosely couple objects together in a flexible way. For example, this is used by NSCollectionView to glue the interface (the GUI) of the program to the actual code of the program.

Key Value Coding means that you can get the value of a property by its key (which is a string). Note that this is exactly what a NSDictionary does, so making your custom class work with KVC, is a lot like making it look like a NSDictionary.
If you are still confused about what KVC is and want to know more, you may read the excellent page on KVC at MacResearch.

Turning a class into a KVC class
To make a class KVC compliant, it has to respond to the -valueForKey: method. The quick and dirty way is to implement this by checking the string and returning nil if it's an unknown key. In many cases this will actually work. There are some little extras that you should know, though. They are best explained by example:
@interface Album : NSObject {
NSString *artist, *title;
}

@property (retain) NSString *artist, *title;

// in Album.m

@synthesize artist, title;

-(id)valueForKey:(NSString *)key {
if ([key isEqualToString:@"artist"]) {
if (artist == nil)
return [NSNull null];
return artist;
}
if ([key isEqualToString:@"title"]) {
if (title == nil)
return [NSNull null];
return title;
}
@throw [NSException exceptionWithName:NSUndefinedKeyException reason:[NSString stringWithFormat:@"key '%@' not found", key] userInfo:nil];
return nil;
}

-(NSArray *)allKeys {
return [NSArray arrayWithObjects:@"artist", @"title", nil];
}

-(NSArray *)allValues {
return [NSArray arrayWithObjects:artist, title, nil];
}

Concluding
When making your class KVC compliant, take care of the following:
  • implement -valueForKey: and check the name of every property
  • if the property is nil, return [NSNull null] to indicate that the value is nil
  • throw an NSUndefinedKeyException if the key is not found
  • implement -allKeys, returning an array containing all valid keys
  • implement -allValues, returning an array containing all values

Sunday, June 13, 2010

flocking boids

Hi ... I got a bit stuck with my 3D space game when trying to get real-time impostors right. Impostors are dynamic billboards for rendering hundreds of distant asteroids. After a three week holiday, it was hard getting back into the code, so I put it on hold for now. On the bright side, I started working on a new arcade game that is really 2D, but with a 3D twist. It is inspired by Geometry Wars / |g|ridwars, GridRunner, and another old Jeff Minter game that features four cannons along the screen edges.

An intern that I'm currently working with, pointed out flocking to me. The guy is studying game technolology — you can actually get a master's degree in game technology nowadays, how great is that?
Anyway, flocking, also known as swarming, is a technique reminiscent of particle systems. While particle systems simulate physics models like fireworks, smoke, or fountains (water drops), flocking is an AI system that is great for simulating groups of animals. An impressive YouTube video shows such a simulation of a flock of birds that is under attack by two birds of prey.

On first thought, you might think that group behaviour is programmatically implemented by controlling the group as a whole. This is not true. Every bird (or boid, as the bots are called) in the flock is an autonomous entity sporting its own artificial intelligence.
How is this implemented? Each boid has an area of sight. If it sees it is going to collide with another boid (or object), it will adjust its heading to avoid collision.
At the same time, the boid wants to stay with the group. It does this by adjusting its heading, to get close to others, while trying to match the heading of a boid that is near. As a consequence, the boid will follow others.

Coming from an age when computers were slow, I first thought that this would be too slow to do in real-time. As it turns out, a modern cpu has no problems whatsoever with the little bit of math required for directing each boid. A pitfall is to have a boid influence another, and recursing because this action influences another, and ... You should not try to solve a mathematical puzzle here. Instead, focus on only one boid at a time and have it make the decision of how to adjust its heading. Do this for every boid, every discrete time step.

I implemented the AI rules in 2D in a game, and while the result is not as impressive as the flock of birds video, it is kind of cool. I started out by making sure that the monsters (or boids) would no longer pass through each other. This is done with a simple circle collision test. When a monster collides, it chooses another direction to move in. Once this was working, changing the code to get flocking behaviour was rather easy: increase the collision radius (area of sight) and adjust the direction only slightly rather than choosing an entirely different direction.
One problem I ran into was that the play area in this game is small and I don't want monsters to fly off the screen. So, the monster had to turn at the edges. Again, increase the area of sight, and have it adjust the direction.

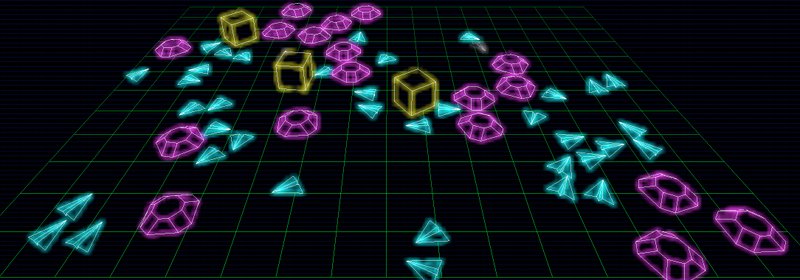
In the game, the gliders (paper airplane models) flock together, while the magenta thargoids are going around like bumper cars, and are disturbing the gliders. The yellow cubes are stationary obstacles in the arena.

Note that it is possible to extend the AI with more rules, but flocking is a technique that already yields quite amazing results with just a few simple rules.

Sunday, April 4, 2010

Vertex Buffer Objects - what you can and can not do with them

In 3D games, models consisting of thousands of vertices and polygons, are rendered to screen at least at 30 frames per second. For every frame, these vertices are transmitted from the memory to the GPU over the bus. For static models, this is a huge waste of time and bus bandwidth, because the vertices are the same for every frame. Why not cache the data in graphics memory and tell the GPU to get it there? This is what vertex buffer objects (VBOs) are all about.
In my 3D space game, I added the 3D model of an asteroid. The model has ~2700 vertices, which is not much at all (by modern standards), but I decided it should be a VBO and enable the code for even higher detailed models.
Never having used VBOs before, I took the safe route and implemented the asteroid first without any VBO code, and rewrote it later to use a VBO. This was a lot of extra work, but there were some lessons learned.
I found the following:
  • use GL_TRIANGLE_STRIP for the most efficient way of rendering shapes. However, for most meshes from 3D modelers you would use GL_TRIANGLES. For the asteroid, I use GL_TRIANGLE_STRIP.
  • Use glDrawElements() rather than glDrawArrays(). Making an extra array with indices seems more work but is very worthwhile the extra effort.
  • I had to include degenerate triangles to stitch multiple triangle strips together. Degenerate triangles are 'fake' triangles that refer to the first vertex in the next triangle strip. (Consider triangle ABC, and degenerate triangle DEE to refer to EFG).
  • ARB extensions for VBOs are old-fashioned by now. VBOs have been included in OpenGL for a long time and you can use the functions without the need for meddling with ARB extensions.
  • Allocating a new VBO for every type of coordinate is wasteful. Instead, allocate a single VBO to store vertices, texture coordinates, normals, colors, etc. and use glBufferSubData() to place the data into the vertex buffer object.
  • If you use glDrawElements(), you must buffer the indices using a separate VBO. The reason for this is that the indices have target GL_ELEMENT_ARRAY_BUFFER. I tried mixing indices into subbuffers (GL_ARRAY_BUFFERs) and it did not work for me.
  • If you do not have an array at hand, but generate coordinates on the fly, use glMapBuffer() to get a pointer to memory. Mind that you are not directly writing into graphics memory; the buffer will be copied to graphics memory by glUnmapBuffer().


So, are VBOs the golden egg? Well, no. They are a great way of speeding up the rendering of high poly-count meshes. There are things that VBOs are simply not suited for. This has to do with both the limitations of OpenGL and what it is that you're trying to achieve. For example, I tried loading the stars into a VBO. This turned out not to work very well, because in my code, stars are point sprites, and each star has a specific point size. Since you can not set the point size in a vertex array, it also makes no sense to use a VBO. I sorted the stars by size to draw them as a vertex array nevertheless, but this resulted in a low vertex count per call so it still makes no sense to use a VBO here.

I also noticed that 1D textures do not work in vertex arrays. Maybe I'm using them for the wrong purpose (texturing GL_LINEs) but considering that glBegin/glEnd is practically deprecated there may be a problem here.

Another problem I had was with face culling. This is not the VBOs fault, but I suspect that when you drape a triangle strip into a convex shape, it may show artifacts. Enabling depth testing did not help me here, but disabling face culling did.

Although VBOs are an add-on to vertex arrays, it seems like OpenGL always requires you to turn your code inside out when you want to change something. I stuck to static meshes for now and decided to abstract a VBO class from it, which wasn't exactly easy either. Anyway, here is a link to a site that I used to implement VBOs:

Sunday, March 7, 2010

Real-time rendering a lens flare

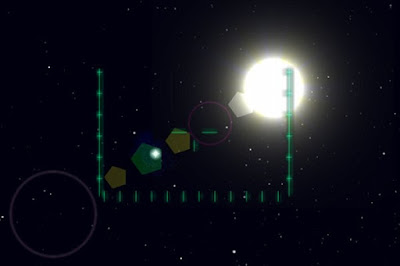
After adding a sun to my 3D space flyer, the only thing missing was a cool lens flare special effect. Making a lens flare is not very hard, and the effect looks great. It makes your environment look more realistic, it comes to life.

Oh sunny boy
The sun is by itself worth a paragraph in this blog. When rendering a sun, don't fall into the trap of texturing a sphere with a "sun" texture — this looks very unrealistic. Instead, use a textured quad to display an image of a sun. Photos by NASA are practically unusable here, but the photos do show that the sun as seen from space, is a white ball with a yellowish glow, and has streaks. You can make a sun texture using the GIMP (or Photoshop) and choose Light effects: Nova. Apply radial gradient to fade away to the edges of the image.
When displaying the textured quad in-game, I did not want the sun to visibly rotate as we're rotating the spaceship. The perfect way to do this is to do "cheating spherical billboarding". This ensures that the sun with its streaks remains stationary even when we are rolling the spaceship (and thus, the view). Cheating spherical billboarding works like this:
glPushMatrix();
glTranslatef(position.x, position.y, position.z);

// reset submatrix to identity: do cheating spherical billboarding
glGetFloatv(GL_MODELVIEW_MATRIX, matrix);
matrix[1] = matrix[2] = matrix[4] = matrix[6] = matrix[8] = matrix[9] = 0.0f;
matrix[0] = matrix[5] = matrix[10] = 1.0f;
glLoadMatrixf(matrix);

... draw 2D textured quad here ...

glPopMatrix();
Use additive blending to give the sun the bright intensity that it has.

Shine a light on me
Now that we have a sun, let's get to the lens flare part. A lens flare is a series of rings or circles in the line of sight to a bright flash (like the sun). This line always cuts through the center of the camera. So, knowing the position of the sun and the position of the camera, we can calculate the positions of the flare elements. How many elements you want and what size they should be is up to you.
Note that when looking directly into the sun, the lens flare will be larger than when the sun is off to the side. So, you can use the distance as a measure for scaling the lens flare elements.

When searching the net, you will find that NeHe's tutorial renders a 3D lens flare even though a lens flare is really a 2D special effect, as it occurs in the lens of the camera.
The math for a 3D lens flare is less intuitive than for a 2D lens flare and drawing the flare is easier in 2D, so I implemented it as a 2D image post-processing effect.
The following needs to be taken into consideration:
  • when the sun is visible, a lens flare effect should be drawn
  • use gluProject() to find the 2D onscreen position of the sun
  • gluProject() returns pixel values; scale these to fit your viewport
  • the distance between the sun's 2D position and the center of the screen is a measure for the scale of the lens flare elements
  • vary color and size of the flare elements
  • use additive blending because we are working with light effects
  • the sun may be occluded by another object in which case a flare should not be drawn
If there is an object in front of the sun, no lens flare should be drawn. NeHe's tutorial shows that it's easy to do a depth test here by reading a single pixel from the depth buffer using glReadPixel(). The fun part is that in my code the sun is drawn infinitely far away with depth testing disabled, so if the depth buffer contains a value here, there must be an object in front of it.

The easiest way to draw the flare elements evenly spaced over the line of the flare, is to make a vector from it, normalize it, and "travel along" this vector to place the elements.
The code looks just like this:
GLfloat center_x = SCREEN_WIDTH * 0.5f;
GLfloat center_y = SCREEN_HEIGHT * 0.5f;

// screenPos is the onscreen position of the sun
// mind that the pixel coordinates have been scaled
// to fit our viewport
GLfloat dx = center_x - screenPos_x;
GLfloat dy = center_y - screenPos_y;
GLfloat len = sqrt(dx * dx + dy * dy);

// normalize the vector
GLfloat vx = dx / len;
GLfloat vy = dy / len;
// choose a spacing between elements
dx = vx * len * 0.4f;
dy = vy * len * 0.4f;

// note that we already are in 2D (orthogonal)
// mode here

glPushMatrix();
glTranslatef(screenPos.x, screenPos.y, 0);

// travel down the line and draw the elements
for(int i = 0; i < numElements; i++) {
glTranslatef(dx, dy, 0);
draw_flare_element();
}
glPopMatrix();
The result is quite nice. You can make things crazier by adding more circles, starbursts, hexagonal elements, and horizontal blue anamorphic streaks.

Monday, February 15, 2010

Rendering glow

Hi, in the space game that I'm working on lately, I added a gyroscope-like object to help the player orientate him/herself in 3D. This gyroscope is presented as a wireframe sphere with a ring around it. To this gyroscope, I wanted to add a "glow" effect to it so that it looks ultramega cool.
Rendering glow is nothing new, and with some googling you can quickly find descriptions on how to do it. As always, it's easier said than done, especially when you've never rendered glow in your life before — so I like to write a little blog entry about this.

So, how does it work? In essence, just render a blurred copy of all glowing parts in the image, and then do an additive blend of the object. So the steps to take are:
  • render glowing parts of scene
  • copy rendered image data to a pixel buffer
  • apply blur filter
  • put blurred image into a texture
  • draw texture
  • set blending to additive blending
  • render scene
I tried reading the pixel data with glReadPixels(), which didn't work for me for some reason (in hindsight, maybe the back buffer was not selected, or maybe some other problem). I read that glReadPixels() is slow and you should use glCopyTexImage2D() anyway. One caveat with glCopyTexImage2D() is that you must call glTexParameter() or it will not work.
Since the image is blurred anyway, it is usually OK to work with a low-res texture (that gets stretched when drawn).

The code for making the texture looks like this (note how I use the home-made PixelBuffer class):
/*
...
start by rendering the glowing parts of your object here

...
*/

// put rendered image into a texture
glEnable(GL_TEXTURE_2D);
glBindTexture(GL_TEXTURE_2D, texture_id);

glTexParameteri(GL_TEXTURE_2D, GL_TEXTURE_MIN_FILTER, GL_LINEAR);
glTexParameteri(GL_TEXTURE_2D, GL_TEXTURE_MAG_FILTER, GL_LINEAR);

glCopyTexImage2D(GL_TEXTURE_2D, 0, GL_RGBA, 0, 0, 64, 64, 0);

// get the pixel data from texture and blur it
PixelBuffer *pixbuf = [[[PixelBuffer alloc] initWithWidth:64 andHeight:64] autorelease];
glGetTexImage(GL_TEXTURE_2D, 0, GL_RGBA, GL_UNSIGNED_BYTE, [pixbuf pixels]);
[pixbuf renderFilter:blur];

// put the blurred image back into the texture
glTexSubImage2D(GL_TEXTURE_2D, 0, 0, 0, 64, 64, GL_RGBA, GL_UNSIGNED_BYTE, [pixbuf pixels]);
Now simply render a quad and texture the blurred image on it. Use alpha blending to make it look better. For the second part, enable additive blending and render the scene again.
glBlendFunc(GL_SRC_ALPHA, GL_ONE);
glEnable(GL_BLEND);
I use GL_SRC_ALPHA rather than GL_ONE, but you really have to try and see whether it makes a difference or not.


For making the blurred texture, I first set the glClearColor() to 0, 0, 0, 0 (even zero alpha). This was needed to get the desired result. You may not need to do this, depending on what it is you're doing, but I mention it here because it was one of those gotchas.

Lastly, many say you need to reset your viewport temporarily to the size of the texture. In this case, I did not need to do this. However, as you add more glowing objects to your scene, it's wise to render all glowing objects in a scene to a single blur-texture in one go. Then draw a fullscreen quad with the blur texture, and off you go.

Wednesday, January 27, 2010

Rendering random nebulae (part 3)

My brother, who is a hobbyist programmer himself, had the constructive comment that my nebulae were overall too dark. Real nebula have dark and bright areas, he said. And he is right, I guess. So I decided to give it a go and tweak the nebula a bit more.

Shaping up nicely
One problem was that when the shape of the nebula was determined, the cloud was pretty much flattened out. This happens because the heights of the bubbles that define the shape are all added up and clamped to 255, which is the maximum alpha value. A consequence of this is, that the nice height map that was created using a plasma renderer, is all flattened. I changed the shaping algorithm so that the inner height map in the cloud is mostly preserved (by taking averages), while still fading at the edges. This gives the cloud a fluffy, three dimensional look.

Previously, I would render a plasma, blend in colors, and finally determine the shape of the nebula. This time, each layer has its own shape. The result is that the colors are more coherent and staying together in their own little "sub cloud".

A Blurred Vision
It seemed like a good idea to blur the image to make it a vague cloud. This turned out not so well; blurring the image takes all detail out of the image. (Sounds kinda obvious, doesn't it?)

I also did some trickery with the alpha channel previously, to fade the entire image. This was totally unnecessary, as you can set the alpha factor with glColor4f() when the final texture is being drawn — so I took out this code, simplifying things. Since the background is the black void of space, this only controls the brightness of the nebula.

Blending In
Previously, I used alpha blending to blend in colors into the nebula. Alpha blending is real nice, but for rendering clouds it's better to use additive blending. The formula used is:
result = alpha * srcPixel + destPixel
In OpenGL, you would call this:
glBlendFunc(GL_SRC_ALPHA, GL_ONE);
glEnable(GL_BLEND);
What's cool about additive blending, is that blue and red make magenta, and blue and yellow make green. This may sound obvious, but note that this is not true for alpha blending.
I also use additive blending for making some extra bright stars. Experiments with additive blending in layers multiple times into the nebula were not exactly successful, as it looks funny when you make it super bright.

On one hand, I'm very happy with this result, while on another ... it shows the plasma algorithm. It's almost as if blobs of paint have been splatted onto the screen in a pseudo-random way. Ever heard of the Holi festival? I think it may be a good way to generate clouds too. But for now, I'll leave it at this.

Wednesday, January 20, 2010

Rendering random nebulae (part 2)

Last time, I talked about how to render a random nebula. As a final remark, I stated that the nebula had no shape; the plasma simply fills the entire image to its boundaries. The result is that you end up with a texture that is unusable; you can not have a nebula in the starry sky that is shaped perfectly like a square. So, we need to give it a random shape.
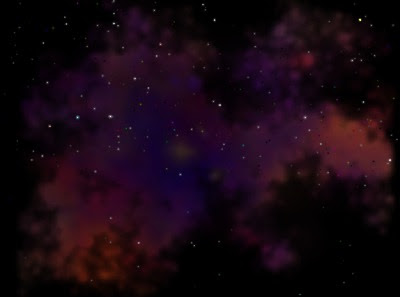
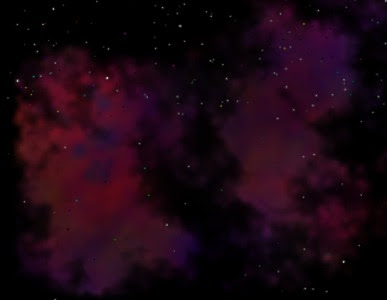
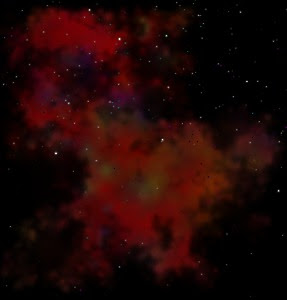
I tried fading out at the edges, and I tried a simple circular fade. It doesn't work. In the first case, you end up with a perfect square, that perfectly fades out to the edges. In the second case, you end up with a perfect circle. Both look like crap, we really need a random shape.

I decided the alpha channel of the nebula should be like a height map, with height zero around the edges. I tried out the diamond-square algorithm, which seems ideally suited for this (by the way, the plasma of the nebula is generated using a diamond-square algorithm), but it's hard to control around the edges. I thought about leveling the edges by 'pushing a pyramid' down over the image, but I'm sure it wouldn't look nice.

How do you generate random shapes? The answer: with a fractal. The word 'fractal' sounds very mathematical and difficult, but its not. See wikipedia for some info.
Algorithm used to generate a fractal shape:
  1. draw a circle;
  2. choose a random point on the edge of the circle;
  3. divide the radius by two;
  4. recurse; draw smaller circle at the newly chosen point.
Using a circle as a brush is not a bad choice, but if the edges have to fade, then the brush should be a radial gradient. I had a little trouble in drawing a radial gradient and did not find the right solution online, so I'll share my formula with you. It's actually easier than you might think:
float d = sqrt(dx * dx + dy * dy);
pixel = gradient - (int)(d / radius * gradient);

d is the distance of the pixel to the center of the circle.
gradient is the difference between the low end and the high end of the gradient; usually 255 for a full spectrum.
I work with overlapping circles in the alpha channel, so I use:
new_alpha = old_alpha + the gradient formula
When you do this, you will get a lot of high values in the alpha channel as they add up quickly, and that doesn't look good for nebulae. Therefore I chose a small value for the gradient variable, and then the results get quite nice.
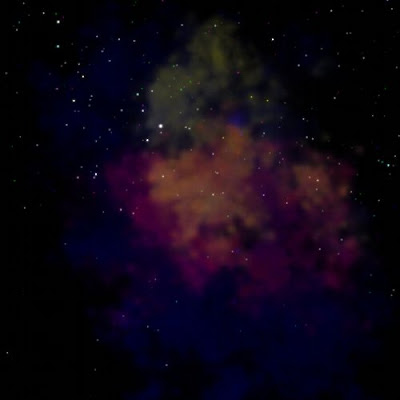
Here are some small screenshots:


Sunday, January 17, 2010

Rendering random nebulae (part 1)

As I wrote in my previous post, I'm playing with a random 3D star field lately. To this star field, I like to add some nebulae to fill the black void of space. Previously, I worked with dozens of photos of existing nebulae from NASA. This time, I decided I want the scene to be entirely fictional, so there is no place for real nebulae.

Bring Out The Gimp
There is a way to draw nebulae by hand. Fire up the GIMP (or Photoshop, or alike), and select Filter : Render Clouds : Plasma. You now get a colorful mix onscreen which is probably not quite like what you had in mind. Now select Colors : Desaturate to make it look like a grayscaled image. Now select Colors : Colorize and drag the Hue slider to select the desired color for the nebula. To make the nebula look nicer than this, we probably have to mess with transparent layers, but this is the basic idea.

Programmatically speaking
A way to go would have been to use ImageMagick's library to do the described operations. Well, it seems that MagickWand (ImageMagick's C API), does not include a plasma renderer. The C++ counterpart, ImageMagick++, does, but being mostly a standard C programmer, I'm quite intimidated by its use of templates and references. And to be honest, I could not even get any decent looking nebula by trying to use ImageMagick from the command-line.

I got some neat plasma rendering code in standard C from the source code of the GIMP. Well, puting it like this makes it sound easier than it was, but I adapted it to work with an RGBA pixel buffer. I also wrote filters for desaturating (grayscaling), blurring, colorizing, alpha blending, and something that I dubbed "fadebuffer", but it's really "gray color to alpha" as it puts the gray value into the alpha channel.
All filters work an RGBA pixel buffer and all have the form:
void render_filter_name(unsigned char *pixels, int width, int height);
My Objective-C PixelBuffer class has a method named renderFilter that allows me to use any implemented filter on that image.
@implementation PixelBuffer

-(void)renderFilter:(void(*)(unsigned char *, int, int))filter_func {
filter_func(pixels, width, height);
}

@end
This renderFilter method can be used as follows:
PixelBuffer *pixbuf = [[PixelBuffer alloc] initWithWidth:128 andHeight:128];

[pixbuf renderFilter:plasma];
[pixbuf renderFilter:blur];
[pixbuf renderFilter:grayscale];
fadebuffer_factor(1.5f);
[pixbuf renderFilter:fadebuffer];
colorize_color4f(r, g, b, a);
[pixbuf renderFilter:colorize];
Which is both readable and powerful code.

In pure Objective-C, you would have used a selector and maybe filter classes derived from PixelBuffer, but I like this way of doing things as it allows you to plug in quite standard code easily.

Formula's
I want to share two formula's that I used. One is for computing the desaturation of a fully colored plasma cloud:
gray = (int)(0.3f * red + 0.59f * green + 0.11f * blue);
if (gray > 0xff)
gray = 0xff;
if (gray < 0)
gray = 0;
This works well if the image has lots of color. I experimented a bit with the plasma renderer and adapted it to generate only blue-tones, which results in this formula not working so well, as it takes only 11% of the blue component. So for monotone pictures, do not use this formula but simply take the active color component and put it into the new values for R, G, and B.
Note that this code is floating point and therefore relatively slow. It's easy to change this to integer only arithmetic. If you need more speed, use lookup tables (it costs only 3 x 256 bytes!). I didn't bother because this code is only used for preprocessing.

The second formula is for alpha bending. When you search the net you will find more than one formula to do this. Also, many focus on speed for doing realtime alpha blending in 16-bit pixel formats — this is all old stuff from the late 1990s when computers weren't as powerful.
Anyway, the formula I used is:
result = (alpha * (srcPixel - destPixel)) / 256 + destPixel
Do this for every R, G, B component. Note that in blending terminology you have a 'source pixel' and a 'dest pixel', but they mean to say that you combine the R, G, and B components of source image 1 with the R, G, and B components of source image 2, and that forms the result.
There are many optimizations possible here, like treating the RGBA bytes like one 32-bit integer and using bit masking to take out the components. This is faster because you do less fetching from memory.
Note: If you want to do really good and fast alpha blending, you should probably use OpenGL. The glBlendFunc() is excellent for all kinds of blending, but in this case it involves some hassle; you have to make some textures first and render them to a resulting texture. Since I'm just using this for preprocessing and I'm not interested in doing realtime blending, I decided to implement the blending 'by hand'.

The results
For making the nebula, the above procedure is repeated a few times for different colors, and these images are blended together. The pixel buffer is then turned into an OpenGL texture and textured onto a quad (made up from a triangle strip).

Although it's just a boring gas cloud, I'm quite happy with it. Not everything is well though; the plasma renders into a square and therefore, there is a square nebula in the sky. To make it perfect, the nebula must be given a random shape and fade away near the edges of the texturing square.

Saturday, January 2, 2010

(Simple) Flight Mechanics and quaternions

I've been playing with a 3D star field lately, and what it needs, of course, is a little space ship so that you can fly around. Sounds easy enough, but it's actually quite confusing.

The controls are confusing, but this is actually caused by the camera view. Our eyes and head can move independently from our bodies (well, at least for the most of us) so we can look around without having the feeling of explicitly having to turn. We are accustomed to our Earthly environment, where we think to know which way is up, down, and expect to come back down when we jump up.
Try this:
  1. stand in the center of the room and look straight ahead
  2. shuffle your feet to spin around, keep staring straight ahead
Now, do this:
  1. stand in the center of the room, and look straight up to the ceiling
  2. shuffle your to spin around again, keep staring straight up
Feeling dizzy yet? In the first experiment, you were yawing, going around the Y axis. In the second experiment, you made the exact same movement, but you were rolling, only because you were looking in another direction (down the Z axis).
Rolling happens when you see the horizon spinning in flight sims. Rolling usually isn't present in first person shooters because it's not a very natural movement for a person to make.

Now think about relativity. What if you were standing still, then the room would have moved around you in the opposite direction. People who have a film camera know that there are two ways of filming all sides of an object; one is to walk around the object, while filming it, and the other is to hold the camera steady, while spinning the object. In computer graphics, the camera is typically held in the same spot, while the world is rotated around it. This even holds true when you'd swear there was a camera hovering above and around you, as you were blasting aliens and flying corkscrew formations to avoid missiles.


I observed there are three different ways of controlling 3D movement:
  1. FPS or racing game style movement;
  2. Space sim like movement;
  3. Airplane like movement.
The natural way of things is, that the player primarily looks around in the XZ-plane and may look up and down (Y direction). There is a distinction between up and down, and there is an horizon to keep that clear. In an FPS or a racing game, when the player steers left or right, it is 'yawing' (rotating about the Y axis). The sky is up, the ground is below, and there simply is no roll.

In a space sim, it is more likely you will roll the ship on its side by steering left (rotation about the Z axis). Up and down typically adjusts the pitch. There is not really an up or down, although there are probably some other objects around like ships, space stations, and planets that give you a feeling of orientation. Yawing is probably possible, but by default it flies more like an airplane, because it feels more natural like that. Because you can steer the ship in any direction you like, this kind of control is called six degrees of freedom (6DOF).

Airplane-like movement is much like space sim movement, but there is a clear difference. Steering left will roll the airplane, and when you let go of the stick, the plane levels automatically and roll and pitch will return to zero. This is different from spaceship movement, because the airplane wants to fly 'forward', while a spaceship simply goes on into deep space in any direction you steer it.

Implementation
For the typical first person shooter style game you can get away with having a vector for your heading, and a pitch vector for looking up and down. A camera is easily implemented using only two glRotatef() calls.
For 6DOF, things are totally different. You'd say that you could add a vector for rolling, but that doesn't quite work. The reason that it doesn't work, is because rotations are not commutative. If the player does a roll, pitch, roll, yaw, and pitch sequence, you can not get this orientation right using glLoadIdentity() and three glRotatef() calls. (Note: In theory, it should be possible, but it's an incredible hassle to compute the new Euler angles every step of the way). The correct way to do it, is to use an orientation matrix.
The matrix holds the directional vectors and the coordinates for this object in 3D space. This matrix can then be loaded and used directly in OpenGL by calling glLoadMatrixf() or glMultMatrixf(). Manipulating the matrix is easily done through calling glRotatef() and glTranslatef(). Behind the scenes, glRotatef() and glTranslatef() are matrix multiplications (in fact, the transformation matrices are documented in the man pages) (1).

A single 4x4 matrix multiplication consist of 64 floating point multiplications. When you do incremental rotations without resetting the matrix to identity every now and then, the many floating point multiplications will eventually cause small rounding errors to build up to big errors. This leads to an effect known as gimbal lock. When gimbal lock occurs, the errors in the matrix have become so large that the spaceship can no longer be controlled.
Microsoft Freelancer was a pretty cool game, until one day I ran into gimbal lock right after saving a game. Loading up the saved game would throw you right into gimbal lock again, completely ruining the game.
A way to prevent gimbal lock is to make the matrix orthogonal every once in a while. Orthogonalizing a matrix is such a big mathematical hassle that practically no one is using this technique. So, just forget about that and read on.

There is another way of storing orientation and computing rotations, that does not suffer from gimbal lock. This is done with quaternions. Quaternions are a neat math trick with complex numbers that allow you to do vector rotations, just like with matrices, only a bit different.
Remember from elementary math class that a * a (or a squared) is never a negative number? Well, for complex numbers someone has thought up that i squared equals -1. As a consequence, a whole new set of interesting possibilities opens up, among which quaternions, which are 4D vectors in complex space that can be mapped back into a 3D matrix for use with OpenGL.

The quaternion stuff is quite hard to grasp when you try to understand the math (I guess "complex numbers" aren't called "complex" for nothing). However, if you just go and use them you will probably find that they are not that different from working with matrices.
I'm not going to duplicate the code here, there is some excellent description and quaternion code available here: GameDev OpenGL Tutorials: Using Quaternions to represent rotation. Go read it if you want to know more, and you should know that I think this code is better than the one in NeHe's quaternion tutorial, which apparently has the sign of the rotations wrong.

  1. Note that many 3D programmers write matrix multiplication code by themselves, but this is not always necessary since you can use OpenGL's functions to do the matrix math. An advantage of rolling your own is that you can do some matrix calculations even before an OpenGL context has been created, so before OpenGL has been initialized. Your code will generate an exception/segmentation fault if you call OpenGL before having created a context.